Microsoft Dynamics 365 – Database Transfer Using DBSync
Cloud data and cloud-based applications have grown exponentially over the past years. Combining data sources and applications has become a major challenge for many companies. One important application is Microsoft Dynamics 365 for Sales.
Microsoft Dynamics 365 for Sales is an application that helps companies to interact with current and potential customers. It is widely used due to its convenient characteristics.
Often the data stored in Microsoft Dynamics 365 for Sales has to be transferred to a database such as MSSQL or MySQL.
In this article, you will learn how to do this by using DBSync Cloud Workflow.
Introducing DBSync Cloud Workflow
DBSync is an integration platform that facilitates the integration between different systems. It manages all the communication, data translation and process interaction among the various connected applications.
This platform uses different processes, also known as business processes, to synchronize data between different databases and applications. These processes, in turn, use connectors to link different databases and applications.
DBSync presents you with a series of connectors. One of them is the Microsoft Dynamics CRM connector, which has two versions: online and on-premise.
These connectors allow you to move data in and out of Microsoft Dynamics 365 for Sales, in order to populate data warehouses, synchronize master databases, and streamline transaction details and online payments.
How to transfer from Microsoft Dynamics 365 for Sales to a database
You will now see the necessary steps to transfer data from Microsoft Dynamics 365 for Sales to MySQL. However, the same steps apply to other databases, such as MSSQL, Oracle, and PostgreSQL.
Step 1: Create a new project.
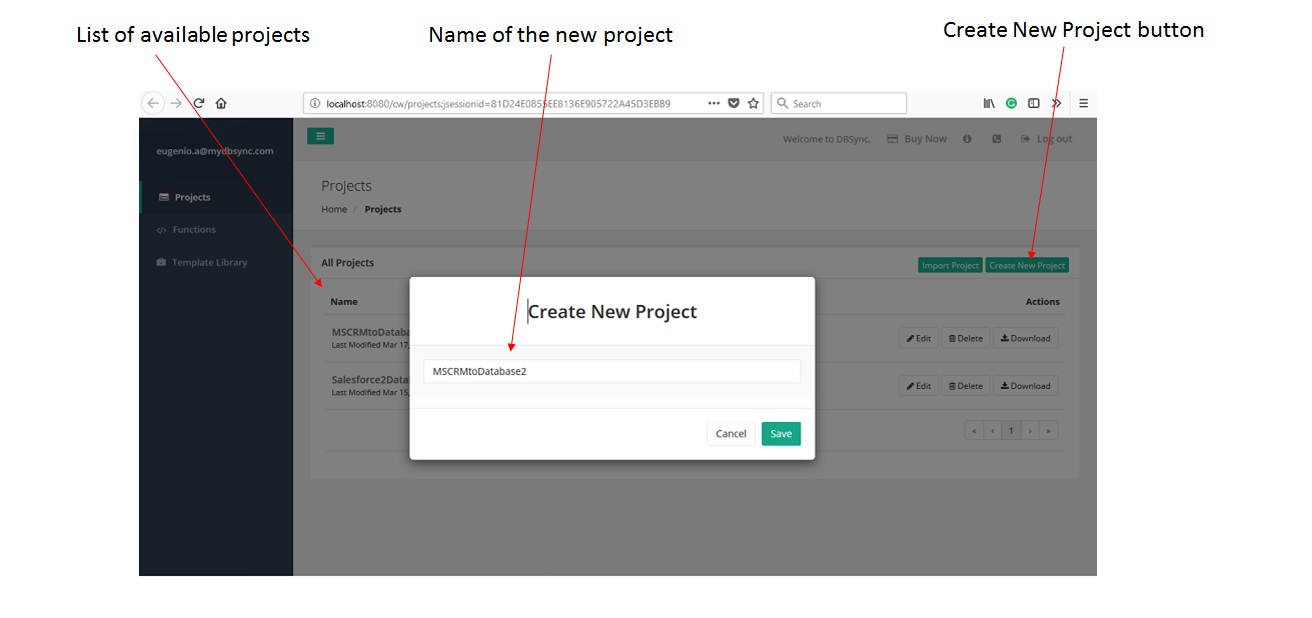
Here you are presented with two options: importing an existing project or defining a new one.
In order to create a new project, you must press the button Create New Project. Then, you will be prompted to enter a name for your project and save it.
Figure 1 – Create a new project
Step 2: Create a connector for each system that you intend to work with.
When connecting Microsoft Dynamics 365 for Sales to a database, you need to create two connectors, one for each resource. One connector will be a Database Connector and the other an MSCRM Online Connector.
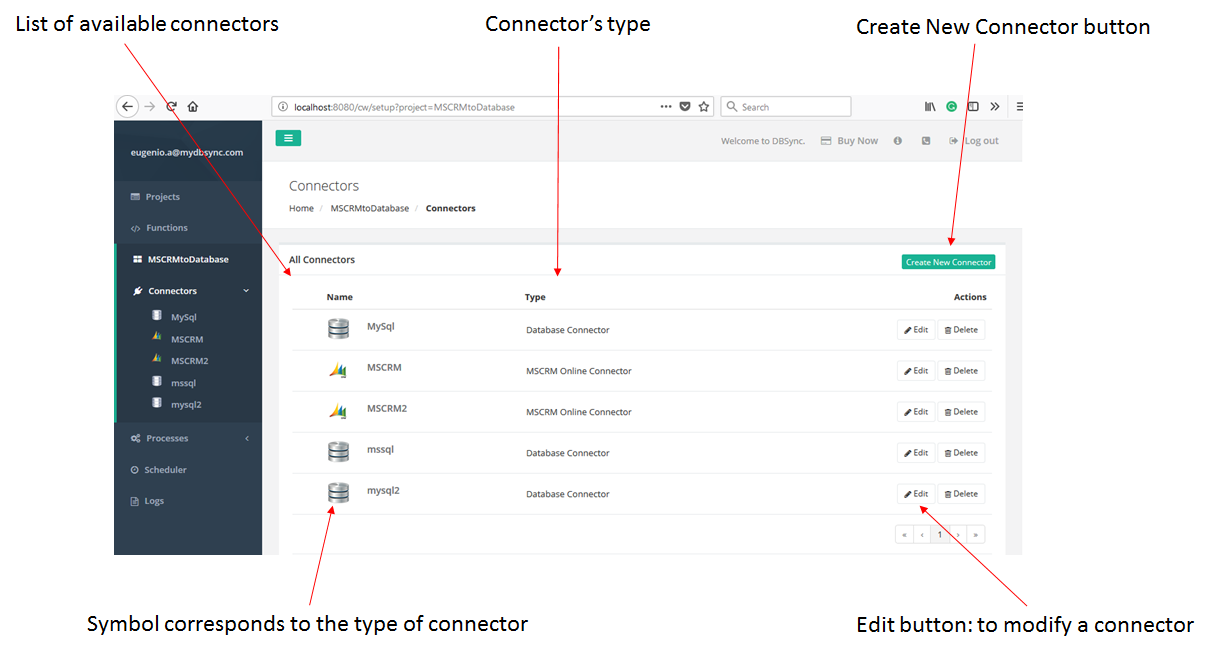
Figure 2: Create a connector
Step 3: Create a process.
Once you are connected to the source and the destination, you need to create a process that defines the transfer task. To do this, press the Create New Process button and input a name. Just remember that process names cannot contain spaces.
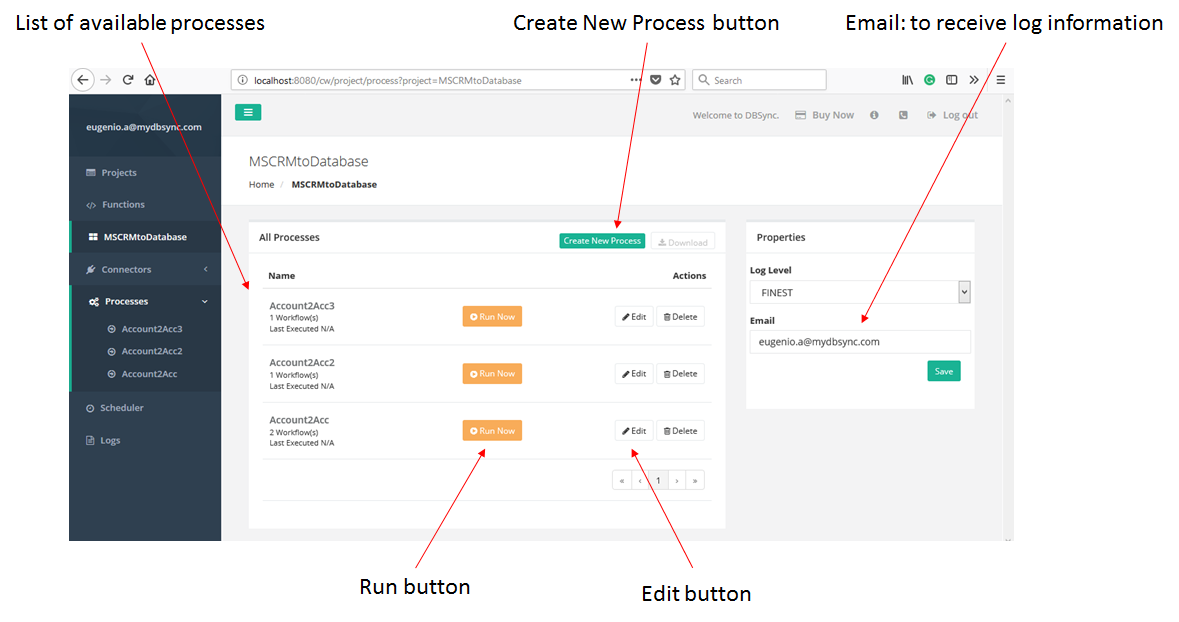
Figure 3: Create a process
Step 4: Create a workflow.
Each process may have several different workflows. In order to create a new workflow, you must press the Create New Workflow button. The system will ask for a workflow name. Just remember that the workflow name mustn’t contain any empty spaces. Each workflow will contain a trigger and one or more rules.
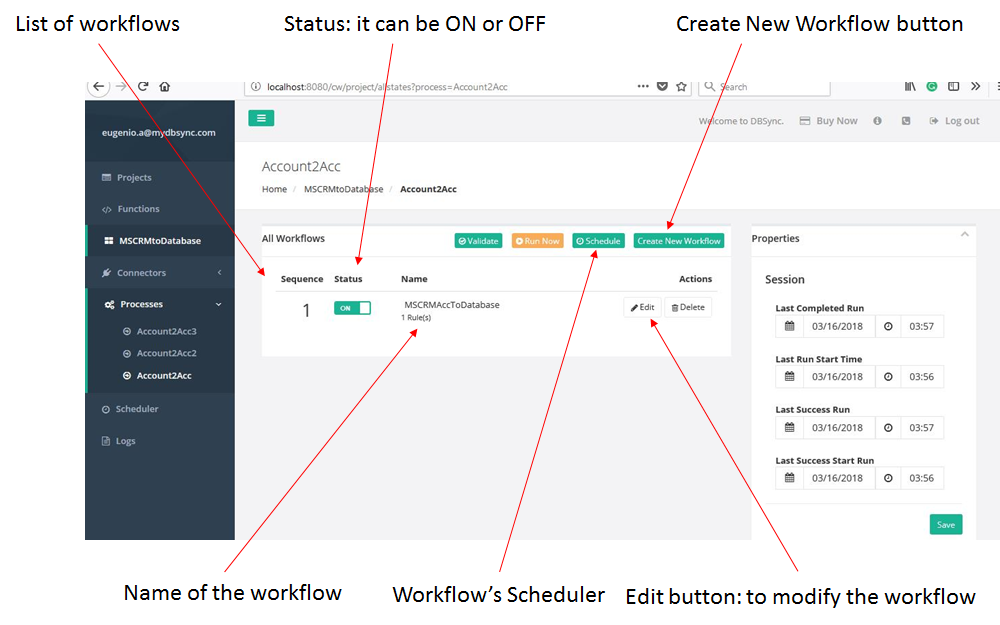
Figure 4: Create a workflow
Step 5: Configure a trigger.
A trigger lets you define a query to your data source, in our case Microsoft Dynamics 365 for Sales. You are presented with two options: query builder and advanced query builder. These alternatives give you the freedom to handle a query at different levels of sophistication, and according to your level of skills.
Step 6: Create a rule.
You can have one or more rules for each workflow. Each rule defines the data destination and a mapping between source and destination.
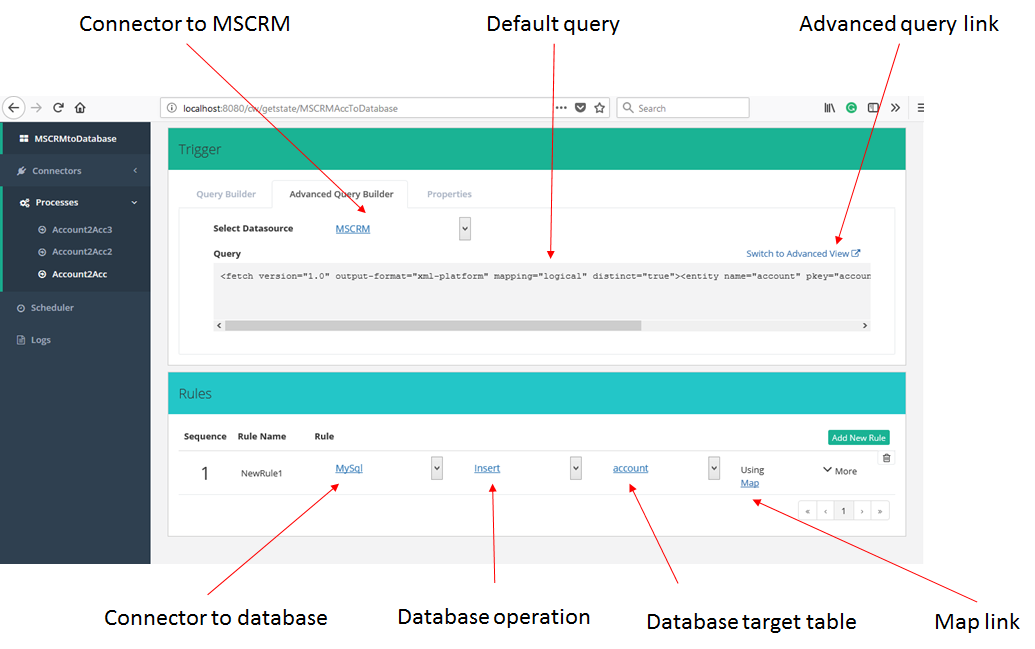
Figure 5 – Trigger and Rule creation
Step 7: Define a map:
A map connects source and target fields. With DBSync, the mapping is very easy as you can connect the source-destination field pairs by dragging and dropping.
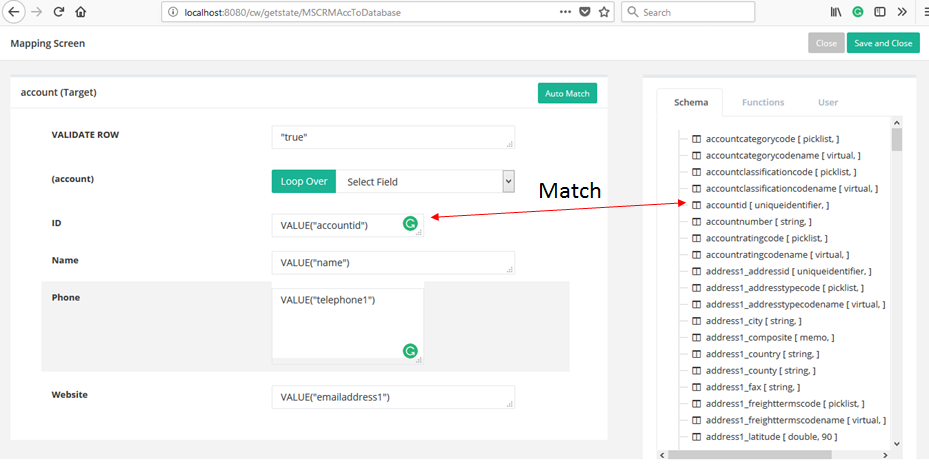
Figure 6 – Create a map
Step 8: Run the process.
You can do it manually or via a scheduler. Manual runs are useful for sporadic tasks (see Figure 3). The scheduler lets you manage repeated runs or run the process at a specific date and time.
What follows
In this article, you have learned how to connect Microsoft Dynamics 365 for Sales and a database. This is just one of the many uses of DBSync Cloud Workflow. There are many more for you to explore. Ready to try? Go to the DBSync website (https://www.mydbsync.com/) and sign up for a free trial.
